 Tax Region


Expert Advice: Changing Brake Fluid - How to do it and why
Fluid dynamics - why something seemingly simple could be massively affecting your braking performance
Brakes not what they used to be? Before you go spending thousands upgrading to a MotoGP-developed, six-pot radial calliper and wavy discs, you might want to change your fluid first, explains Phil Turner.
For a substance that’s designed to live inside metal componentry, brake fluid has an unfortunate quality: it's hygroscopic. It absorbs water from the air. This produces two issues. The first is the obvious one: corrosion - the last thing anyone wants inside their braking system.
The second is that when we apply the brakes the braking system heats up, which can cause any water in the fluid to boil, forming vapour bubbles. As we all know, vapour bubbles are something else we definitely don’t want in our braking system.
How do we stop this happening? We can’t completely, but we can significantly minimise the risk by changing the fluid regularly.
Your bike’s manual (or the service book, as it’s usually done as part of a service at a given interval) should tell you how often it needs to be changed, but as a general rule it should be about every two years. Bear in mind that annual mileage and the type of riding you do will also be factors, so if you’re cracking big distances every month or you’re addicted to track days, you might need to be changing fluid more often.
How to Bleed Your Motorcycle’s Brakes
Changing your bike’s brake fluid is a relatively easy DIY job, providing you’re competent and have the right tools, but - and it’s a big but - if you’re not 100% confident in doing it 100% right, then don’t do it at all, take it to a professional.
The following advice is general - you should consult your bike's owner manual or a recognised workshop manual (e.g. Haynes) for guidance specific to your motorcycle.
What you’ll need:
Spanners - usually 8mm, 9mm or 10mm - for loosening and tightening bleed nipples;
A Bleed Kit - these can be simply a plastic container with a couple of lengths of clear hose, or something much more sophisticated like our Vampire Vacuum Kit that does all the hard work for you;
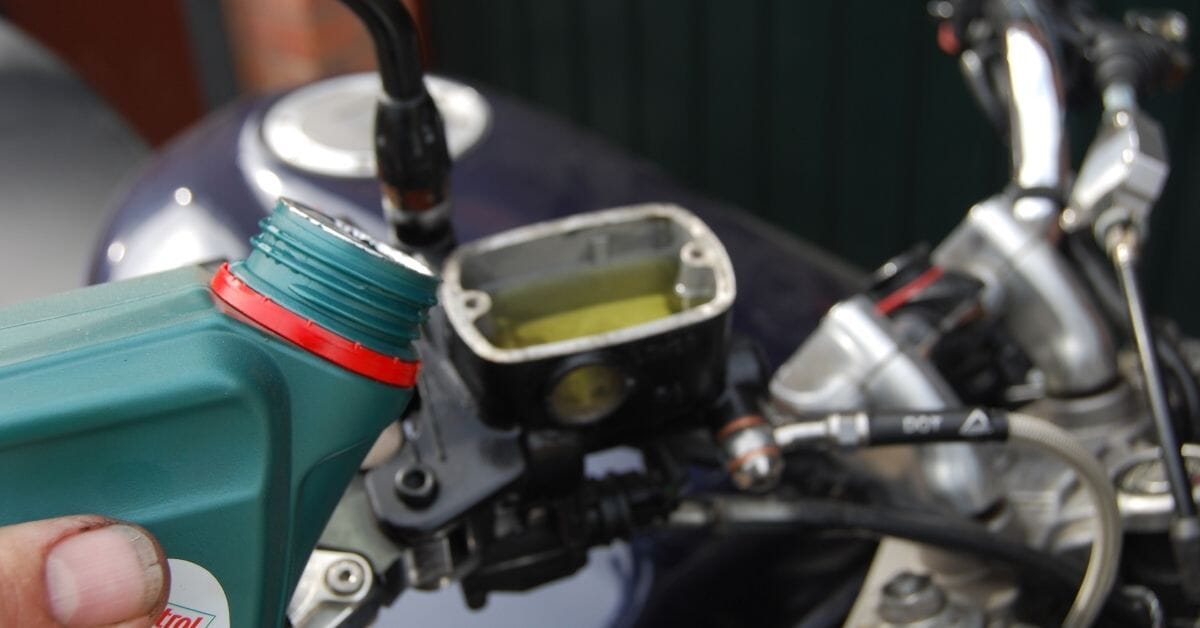
Paper Towels / Cloths - essential, for mopping up any spills. Brake fluid is extremely damaging to paintwork, so it’s also worth covering areas like your petrol tank just in case;
Latex / Workshop Gloves - to stop you getting fluid all over your hands - it’s not advisable to get it all over yourself as well as your paintwork;
Fresh Brake Fluid - Brake fluid comes in different ‘DoT’ types and will either be Glycol or Silicone based. Each one has a different boiling point - so you need to use the right one - and should never be mixed. Your bike’s manual should tell you which is recommended for your model.
Get your head round DOT ratings and what they mean in our Everything-You-Need-to-Know About Brake Fluid DOT ratings blog.
Method:
- Place the bike on its centre stand - or paddock stand - so it is upright and level, and make sure you have plenty of light and space to work in. Cover the tank and headstock area with an old towel or cloth, and pop on your protective gloves.
- Remove the brake reservoir lid; this will either be screwed off by hand or held in place with two Phillips screws or Allen Bolts. There will often be a rubber diaphragm underneath this - it can sometimes stick to the lid, or remain in the fluid - remove this too and have a cloth ready to catch any drips.
- Down at the brake calliper, remove the rubber grommet protecting the bleed nipple. Place your ring spanner on the nipple so that it can be loosened a few degrees without hitting anything. Fit the pipe from the bleed kit to the exposed nipple.
- Crack the nipple loose and apply pressure to the brake lever, you should see fluid passing down the clear tubing into the bleed kit bottle. Re-tighten the nipple and let go of the lever.
- Repeat this until you see bubble-free fluid in the transparent part of the tube, then pump the fluid through, stopping to tighten the nipple each time. Make sure you keep adding new brake fluid to the master cylinder reservoir as it drops.
Tip: Don’t move the brake lever too quickly or it could pop the bleed pipe off the nipple and spray fluid everywhere.
- Fresh fluid looks lighter than old fluid, so when you see the colour change and no more bubbles in the transparent pipe, tighten the nipple up, check the master cylinder level is where it should be and release the lever. If you have twin discs on the front, repeat the process on the other side.
- When you’re happy both calipers have been flushed and filled with new fluid, hold in the lever one final time, crack the nipple and make sure that there are no air bubbles in the tube, then re-tighten. Repeat for both calipers. The brake lever should feel firm with no sponginess. Top up the reservoir to the correct level. Refit the diaphragm and reservoir cap.
- If your bike has a disc at the rear, repeat the above process to flush the rear caliper - they will often have a separate reservoir, so do exactly as you did on the front.
Tip - Some rear callipers are fitted with two bleed nipples. If this is the case, use the nipple that is in the highest position, as this will help remove air out of the system.
- Once all callipers are flushed, check both front and rear fluid reservoirs are filled to their upper levels. Then go around the bike and visually inspect for leaks.
As with any job you’re looking to do yourself, always consult your motorcycle’s manual before you start and if you're not 100% confident, take it to a professional.
Now take the test
Phil Turner has been a motorcycle journalist for 20 years. A former mechanic, he worked as a staff writer and road tester for classic, modern and scooter titles, and edited Motorcycle Sport and Leisure magazine. He turned freelance in 2008 and is a regular contributor to specialist bike titles, both online and print. Phil has owned an eclectic mix of machines, including a Lambretta GP200, three air-head BMWs, a Honda CBF600 and a Royal Enfield Bullet.
- [email protected]
- +44 (0) 1306 885111
- Venhill, 21 Ranmore Rd Dorking, Surrey, South East England, RH4 1HE, GB,